3D Graphics, Tutorials and Tips
Using 3DS Studio Max and Mental Ray
3D Graphics, Tutorials and Tips
Using 3DS Studio Max and Mental Ray


Dr. Who's arch-nemesis, the Dalek as classic Genesis and New Series versions
H.M.S. Nelson, big gunned capital warship from WWII
Edwardian house. Old school architectural renderings
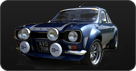
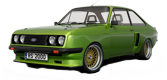
Assorted models and renders
These tutorials focus on using the Mental Ray renderer (iRay tutorials in preparation). The production shaders enable the easy integration of 3d Models into photographs.
These renders have been created to visualise scientific concepts and experimental layouts. A 10 minute HD film was also created.
Geological Waste Disposal Bluray/HD 2009
Geological Waste Disposal DVD 2003
PSG Experiment - Grimsel (Nagra)
Rendering and compositing of 3D models for international Clients
Front cover for Burton Power Catalogue 2012
Front cover for Burton Power Catalogue 2014
Front cover for Burton Power Catalogue 2015
Front cover for Burton Power Catalogue 2016
Wavemaster Design : Ferry design renders
Car Colour Services : Colour and spraying services
Volkswagen Crafter for Volkswagen Australia
DMMultimedia | 3d tutorials | Simple Tyre Tutorial | Basic tyre texturing


3. Basic Texturing for tyre tread and sidewall
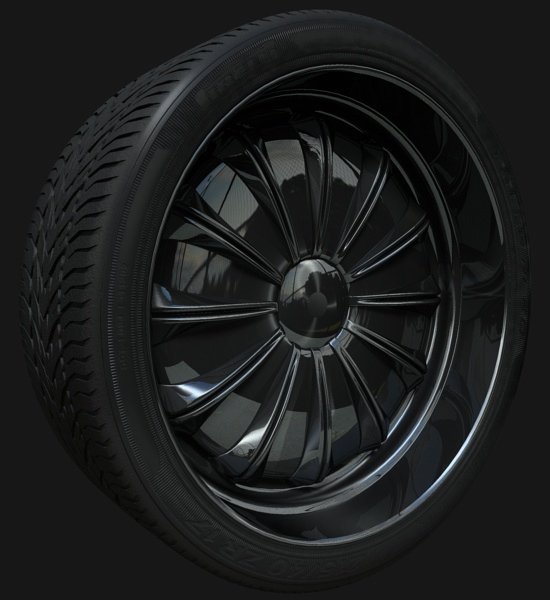
Basic Tyre Texture
Using the Max 9 Mental Ray shader Arch & Design we will create a simple tyre texture. We assigned groups in the previous section to enable us to give different textures to different areas of the tyre. This might be sufficient for some uses but will use a slightly more complex Blend material, blending between the main tyre sidewall texture and the tyre tread texture.
The sidewall texture will be a slightly glossy rubber texture (not too new, not too old). The basic rubber material is slightly reflective but very diffusive. This is perfectly suited to the Arch & Design MR material. We wish to reflect the environment but a VERY blurry version, and still have some glossy highlights.
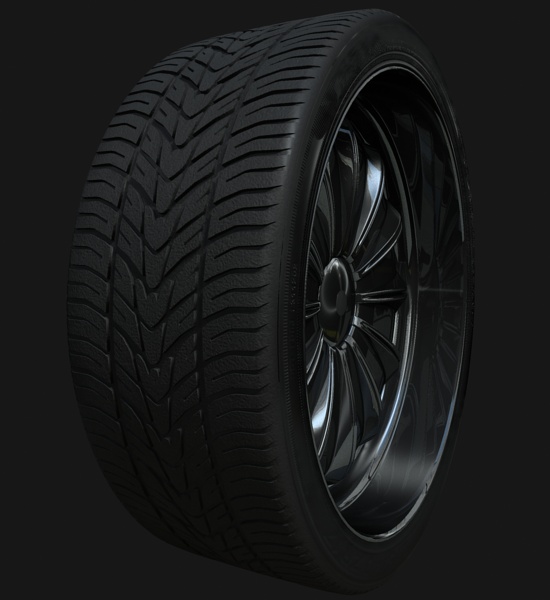
The tyre tread texture will be a diffusive matte texture which will represent the new rubber that has picked up all the dust and dirt from the floor. We will create a noisy texture to represent this.
A custom gradient texture will be used to blend between the 2 main textures.
1. Basic Tyre sidewall texture
This texture is for the tyre sidewall, the face on the side of the tyre. We will setup a slightly shiney texture and add a bitmap for the text/mouldings.
Load in an Arch & Design texture to a blank slot. Setup the Reflection, Anisotropy and BRDF Custom Reflectivity Function as shown below.
The diffuse colour is set with a Falloff map in the diffuse slot (indicated above with a "M"). Load in a Falloff map to the diffuse slot and use the following settings:
Where the Front colour (A) should be a VERY dark grey, and Side colour (B) should be black. If you want your tyre to appear more worn/older then make the Front colour lighter.
Now we add 2 more maps. The environment reflection map (This is only needed if you don't have an environment to reflect) and the Bump map.

A selection of bump maps are available from www.cg-cars.com in the Textures section - this version supplied by 1xpfree. Also added here is an HDRI to the Environment slot.
Notes:
To change the "shinyness" of the trye adjust the BDRF and reflection values. For a "wetlook" finish to the tyre turn the Glossiness value up towards 1.0.
To change the age of the tyre try making the Front colour a lighter grey colour.
2. Tyre Tread Texture
The tyre tread is a simple matte material. This represents all the dust and bits of dirt the tyre has picked up. Load in a standard material with the following settings:
The Noise textures are for the dust and dirt (Diffuse) and the subtle bumps (Bump). These should not be extreme values, use more subtle settings. The size of the noise is dependent on your scene setup. The setup I used for Diffuse Colour was:
Where Color #1 is 27,27,27 and Color #2 is 51,51,49. These can be adjusted to represent different layers of dirt and dust. I used a very subtle effect.
The bump map is also very subtle and uses the following settings:
Where color #1 is 27,27,27 and Color #2 is 212,212,212 and noise type is Turbulence. This give a very subtle rough appearance to the Tyre tread surface.
Mix Map - and Final texture
We can now setup a Blend material using the 2 above textures. Load in a Blend material to an empty slot. Drag and drop the textures we created above to the slots as shown below. The Tyre sidewall goes in the Material 1 slot, and the Tread texture in the Material 2 slot. We will create a gradient texture for the Mask map.

The Gradient Ramp is used to blend the two textures. For this to work correctly we need to add an UVWmapping modifier to the tyre object. The UVWmapping modifier is used to setup how our gradient ramp is applied to the tyre. Apply the modifier as seen below:
This UVW Mapping modifier should be set to Mapping Channel 2 as shown below:
Now setup the Gradient Ramp Mask texture in our Blend material - load in a gradient ramp and use the following settings (this works on the same way as shown in the Brake tutorial) :
Setting the Map Channel to 2 means we can adjust the scale and positioning of the blend independently to Channel 1 (which we will use for our Bump map on the Tyre sidewall texture).
The actual position of the upper blend (Where it goes from Black to white) is where the Tyre tread will appear on the Tyre. This area will depend on the height of your tyre tread and curvature of the tyre tread. The image below shows what the Gradient Ramp looks like when applied separately on the tyre object. I used an instance of the Gradient Ramp in a separate standard material to test this - you can then adjust the Gradient Ramp to get the same effect.

Now apply a second UVW Mapping modifier to the tyre (leave it as Map Channel 1) and the same position as above. This will be for our Bump map in the Tyre sidewall. This is separate from the Gradient Ramp - so we can scale and adjust the position of the bump map independently from the Gradient Ramp mask.
Apply our Blend material to the tyre and render: