3D Graphics, Tutorials and Tips
Using 3DS Studio Max and Mental Ray


3D Graphics, Tutorials and Tips
Using 3DS Studio Max and Mental Ray


Dr. Who's arch-nemesis, the Dalek as classic Genesis and New Series versions
H.M.S. Nelson, big gunned capital warship from WWII
Edwardian house. Old school architectural renderings
Assorted models and renders
These tutorials focus on using the Mental Ray renderer (iRay tutorials in preparation). The production shaders enable the easy integration of 3d Models into photographs.
These renders have been created to visualise scientific concepts and experimental layouts. A 10 minute HD film was also created.
Geological Waste Disposal Bluray/HD 2009
Geological Waste Disposal DVD 2003
PSG Experiment - Grimsel (Nagra)
Rendering and compositing of 3D models for international Clients
Front cover for Burton Power Catalogue 2012
Front cover for Burton Power Catalogue 2014
Front cover for Burton Power Catalogue 2015
Front cover for Burton Power Catalogue 2016
Wavemaster Design : Ferry design renders
Car Colour Services : Colour and spraying services
Volkswagen Crafter for Volkswagen Australia
DMMultimedia | 3d tutorials | Simple Tyre Tutorial | Creating the full tyre


Part 2. Creating tyre tread "Building Block", a strip and then the main tyre
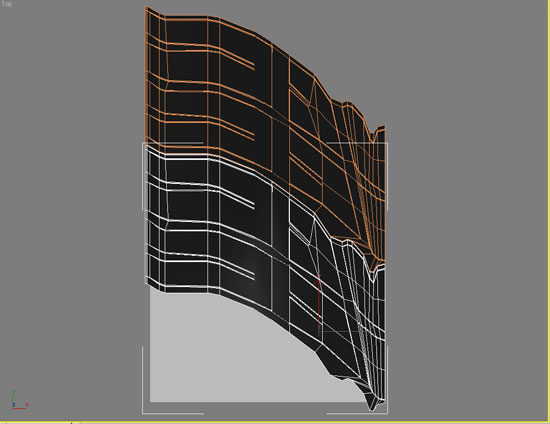
Now that we have a repeatable tread pattern we will adjust this block to make it tileable. Create a copy of the block (instance) and move it above the original.
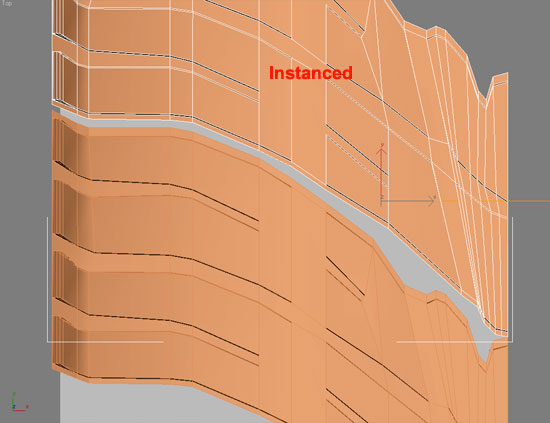
Now we will edit the vertices of the upper instanced tyre tread block. Move the whole object close to the lower block, and then adjust the vertices and line them up with the neighbours. This is why it was important to have the same number of vertices on the top and bottom edges.
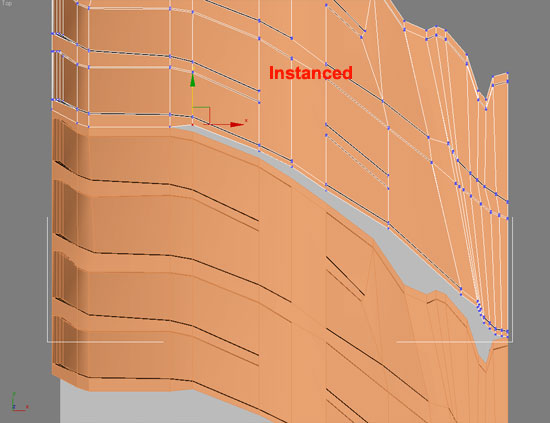
Continue to do this for all the vertices. We will now have a perfectly tileable tyre tread block. We can now delete the upper instanced tyre block.
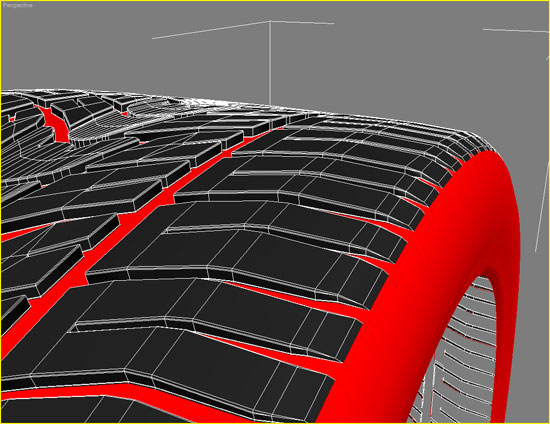
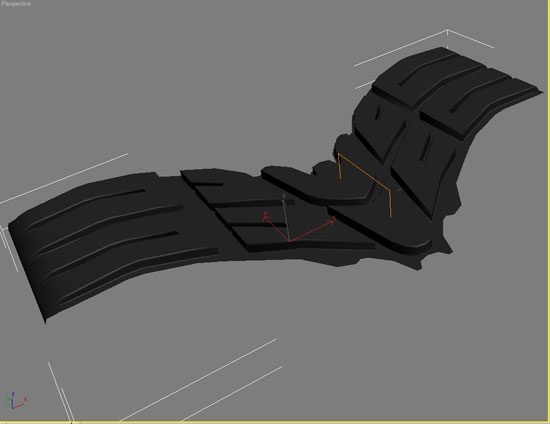
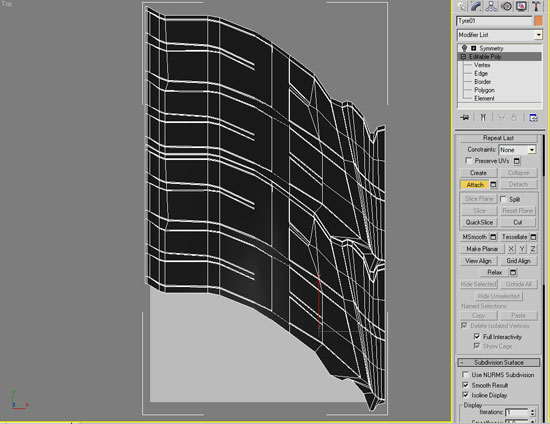
Remember to make sure the outer edge of the tyre has an edge that will loop - see previous section. Also add a slight taper/curve at these edges as shown below. These new edges should have the same smoothing group as the tyre base (not the tyre tread blocks or sides).
TIP: It is a wise move to save the original tyre tread block, by making a copy and placing it on another layer, then hide this new layer. We can then go back and adjust or customise our tyre tread "building block" for another tyre later.
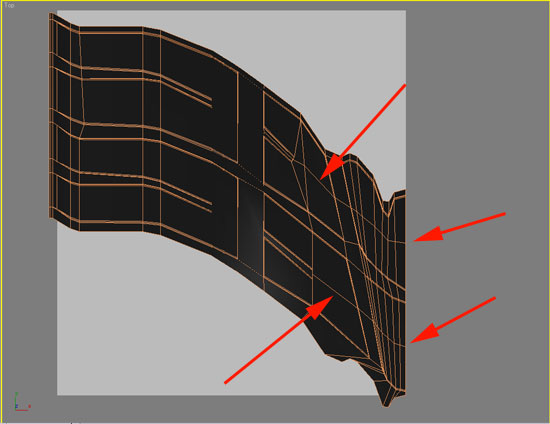
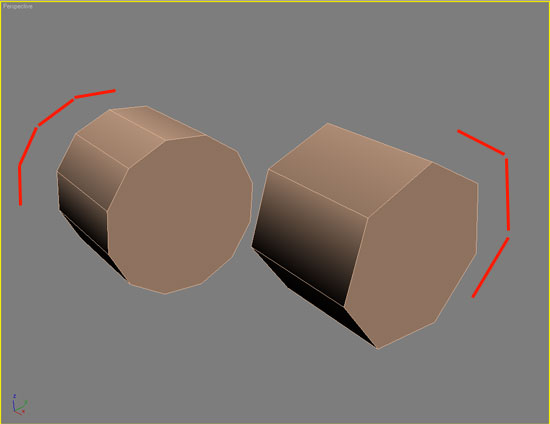
TIP: Make sure that the number of edges running horizontally is high enough so that when we bend the tread block it can actually bend smoother. If we use large area blocks they will not bend smoothly. See below, I added some extra edges to the inner tyre tread blocks. The lower image shows that if we only have few edges lying across the tyre block it will not bend as nicely.
At this point we can also add a Symmetry modifier as shown below. This will give us the full width of the tyre. We will work with this switched off most of the time - it will half the number of polygons displayed and help viewport performance.
This is now our "Building Block". So make any more refinements now, as we will not be modifying the basic tyre tread afterwards. Save your work here.
We will now build up a strip of these "Building Blocks". Switch off Symmetry and create a copy (NOT instance) of our original block. Move it above our original block.
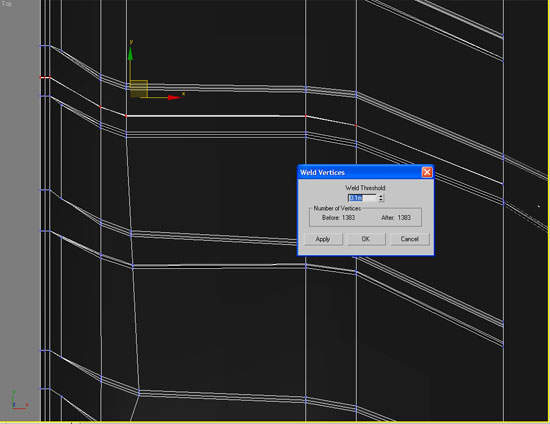
We now select our original tyre tread block and use Attach to join the two blocks together - select the original shape, select the attach button, select the upper new tyre tread block - now joined.
The two parts are now joined into one object but we will still need to join the vertices along the connecting edge. Zoom in and select all the vertices lying along the join line. Use the weld tool and adjust the threshold until all the vertices are joined together. Double check. We can now use this setup for all the next joins.
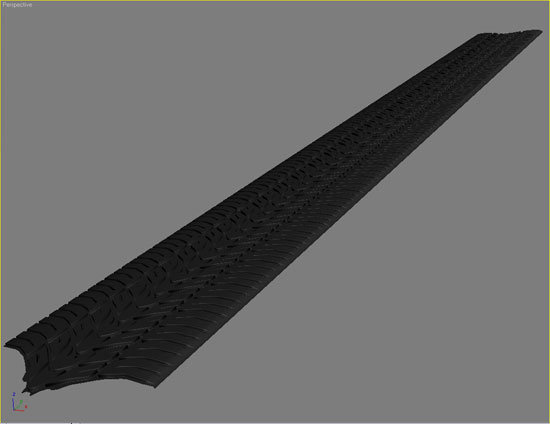
Repeat the above process to double the size of our strip. One way to find out how many blocks we need in our strip we need to use reference photos and check approximately how many times we see a pattern repeated on a tyre - double that and we have our final amount.
At present we have 2 blocks joined together, after the next join this will be 4 blocks, then 8 blocks. It will grow very quickly - so save a copy of a few different block lengths in hidden layers as building blocks. Select copies of these, in different lengths (2 and 4 are good), to build up the tyre tread strip to the exact length we want.
I created my strip to this length (arbitrary - I didn't check against ref photos).
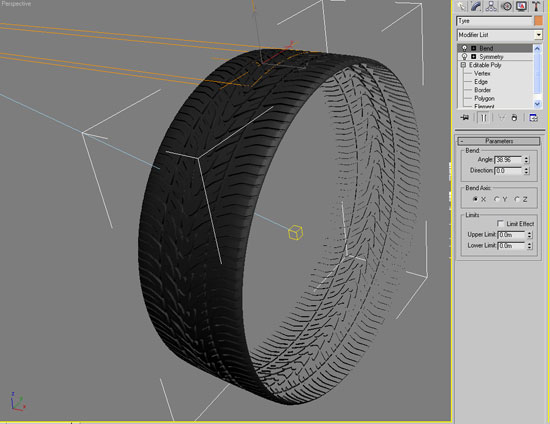
With the circumference of our tyre modelled we now bend it into a circular shape. Switch back on Symmetry and add a Bend modifier and find the direction that you need. I had to rotate my Bend modifier Gizmo 90 degrees as shown. The actual amount of bend will vary from tyre to tyre.
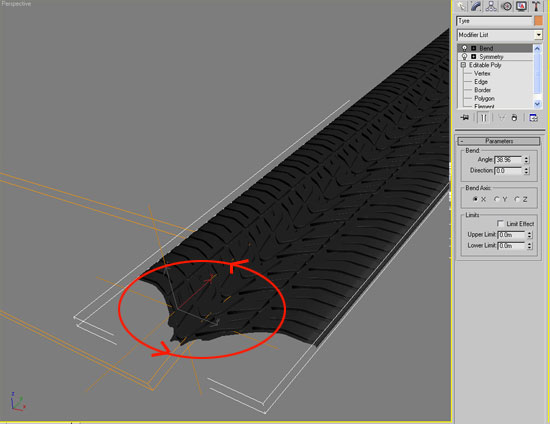
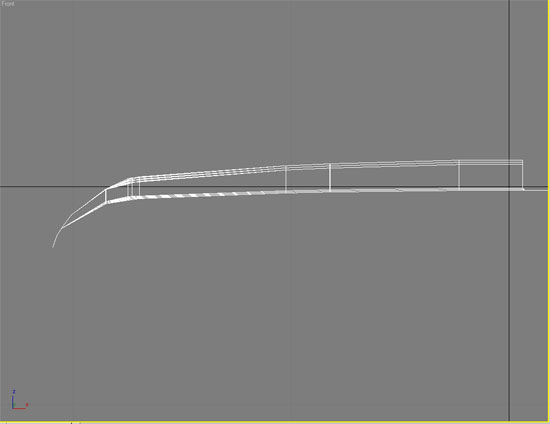
With the Bend modifier Gizmo rotated 90 degrees I get this when adjusting Bend Angle:
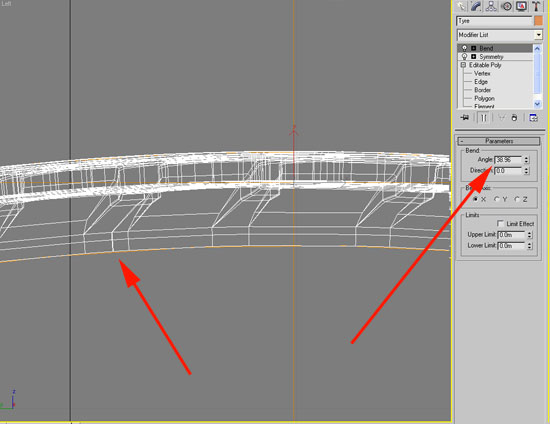
To finely adjust the amount of angle of bend, switch to the side view and zoom in. You will see the edges approach each other. When they are close together, collapse the stack to a single editable poly and weld the final joining edge vertices together.
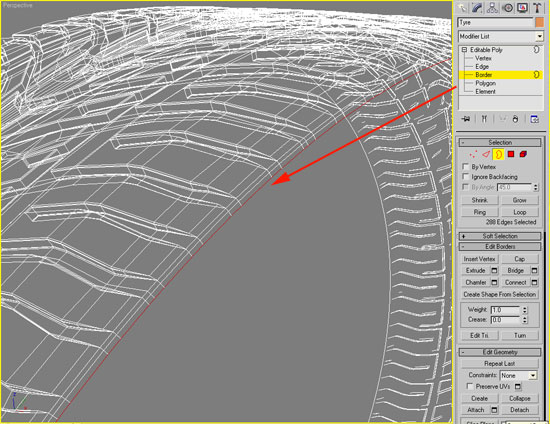
That is the main tread finished, we now just need to add the sidewall. The reason for making those extra edges now becomes clear. Select the outer most edge of the tyre tread using select Border.
With the border selected press the space bar to lock the selection and hold Shift down and then Select and Uniform Scale to create a new edge, then move this in or out to and repeat to create the full sidewall. If you need to refine the shape select an edge, click on ring, then connect to create a new ring of edges.
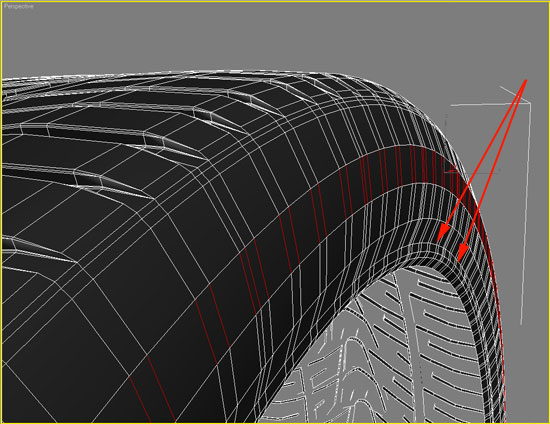
Adjust to give a smooth curved sidewall, and add a little set of edges to create a bulge on the edge that will be on the wheel (this is a little rim protection bulge and most performance tyres have these). Also make sure that all these new polys are in the same smoothing group as the main tyre base.
To add the new polys to the correct group, go to select poly mode, then use the select smoothing group and sect all the OTHER smoothing groups (not the tyre base).
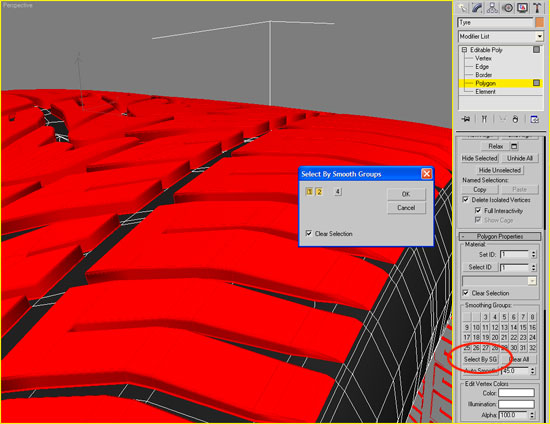
Now go to the Select menu, and Select Inverse. This will select al the other polys. Click on the Smoothing Group number for the main tyre tread base so that it is a yellow number. This gives us the result below. This is now our tyre. Next step - basic texturing.