3D Graphics, Tutorials and Tips
Using 3DS Studio Max and Mental Ray
3D Graphics, Tutorials and Tips
Using 3DS Studio Max and Mental Ray


Dr. Who's arch-nemesis, the Dalek as classic Genesis and New Series versions
H.M.S. Nelson, big gunned capital warship from WWII
Edwardian house. Old school architectural renderings
Assorted models and renders
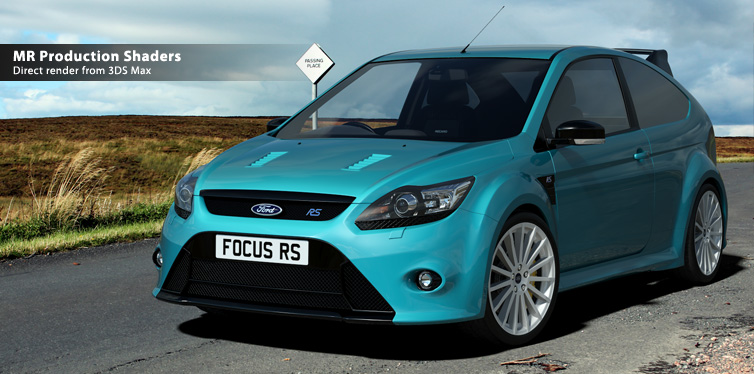
These tutorials focus on using the Mental Ray renderer (iRay tutorials in preparation). The production shaders enable the easy integration of 3d Models into photographs.
These renders have been created to visualise scientific concepts and experimental layouts. A 10 minute HD film was also created.
Geological Waste Disposal Bluray/HD 2009
Geological Waste Disposal DVD 2003
PSG Experiment - Grimsel (Nagra)
Rendering and compositing of 3D models for international Clients
Front cover for Burton Power Catalogue 2012
Front cover for Burton Power Catalogue 2014
Front cover for Burton Power Catalogue 2015
Front cover for Burton Power Catalogue 2016
Wavemaster Design : Ferry design renders
Car Colour Services : Colour and spraying services
Volkswagen Crafter for Volkswagen Australia
DMMultimedia | 3d tutorials | Production Shaders in Mental Ray | Using the Chrome Ball Shaders

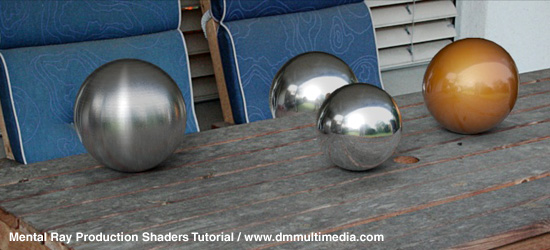
Introduction : The new set of Mental Ray Production Shaders in 3DS Max enables a whole set of features to help with compositing 3D models into images/environments. An example of these shaders in action (created by Zap Andersson) can be found on YouTube: Zap's Production Video
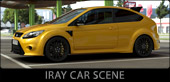
This set of tutorials will show how to incorporate your models into photographic locations - using a mirror ball approach and a 360 degree HDRI environment and applying this all to incorporate a 3D car into an environment.
In this first example we will use the Environment/Background Switcher, Environment/Background Camera Map, Environment/Probe Chrome Ball and Matte/Shadow/Reflection shaders to create the image below. This tutorial is constructed in Max 2009 Design - but it is possible to use these shaders (The shaders use slightly different names and gui layouts) in Max 2008.
In Max 2008 some of the shaders are "hidden" by default. To unhide them you will need to open the .mi files in a text editor and remove the ", hidden" from each declaration. See below.
For MAX 2008 owners: Close Max 2008 : stop the program. Locate the : 3ds_Max_2008\mentalray\shaders_standard\include\production_max.mi text file. MAKE A COPY and save it. Open the original production_max.mi file in a text editor and locate the following: gui_mip_rayswitch_environment And remove the ,# "hidden" at the end of each GUI declaration. Resave the file. Restart Max 2008. You will find some new shaders available in the material editor list. |
SUPPORT FILES: IMAGES AND TEXTURES - backgrounds.zip ~8 Mb FURTHER RESOURCES: Master Zap's Blog - LINK TO FURTHER FILES TO DOWNLOAD MENTAL RAY - Production Shaders PDF |
In this simple scene we will use the following shaders:
Initial Setting up
Open a new scene.
Max2009 starts with Mental Ray selected as the default Renderer. If you are using Max2008 switch to the Mental Ray renderer.
We will work in a linear workflow, so adjust your Gamma to the following. This is explained in more depth in many articles but it is mainly to give a correct display on your monitor, so brightness is more linear. Go to Customise, Preferences and adjust the display, input and output to 2.2 - and enable the Affect Color Selectors and Affect Material Editor:
Units
By default Max 2009 uses metres instead of generic units. If you are using Max2008 switch to Metres by going to the main menu and selecting Customise, then Unit Setup. Click on Display Unit Scale, Metric. It is not essential in this example but good practice.
Exposure Control
By default Max 2009 opens a new blank scene with the mr Photographic Exposure selected. If you are using Max 2008 go to the Environment panel (the 8 key) and select the mr Photographic Exposure. In Max 2009 and Max 2008 setup the values as shown below.
A very important selection we are making is the Physical Scale should be set to unitless. If we were using correctly scaled photometric lights or the mr Sun/Sky we would choose Physical units. We will use standard lights (normally set to value 1.0 by default) so we will use the unitless settings. (It is perfectly possible to use the physical settings but we would also need to boost a lot of shaders shadow maps, intensities etc. to real world values - it is simpler using unitless)
Setting up our Material Editor Slots
Select the first material slot and click on the Get Material icon.
In the Material/Map Browser scroll down past the Materials to the Maps and select the Environment/Background Switcher (mi) Map (this may be called something slightly different in Max 2008).

With this Map in Material Slot one rename it to Environment. This has slots for Background and Environment/Reflections. We will now create the maps for placing in these slots - leave these empty for now.
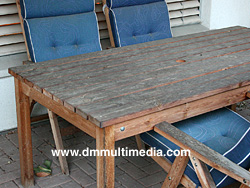
Select the second material slot and click Get Material again. This time select Environment/Background Camera Map (mi) from the Material/map Browser (shown above). Rename this to Camera Map. This is our background image. Click on the map slot and load in the image Garden.jpg shown below . The Multiplier value can be increased if you want a brighter image when balancing the mr Photographic exposure and background image.
One VERY important value we have to change is the Reverse Gamma Correction value. As we are using a linear workplace and most LDR JPEGs have a gamma of 2.2 we need to change this value from 1.0 to 2.2. While JPEGs mostly have a gamma of 2.2 take care if using PNGs as these can have different values of Gamma (And it can cause problems as it is not read correctly). An exception to this Gamma Value is for HDRIs which should have a Gamma of 1.0. Almost all commercial or freely available HDRIs have a Gamma of 1.0.
We are using a JPEG so set this value to 2.2 as shown below.
Now we select the third material slot and load an Environment Probe/Chrome ball (mi) map and rename it Chrome Ball. This is the map that will produce the environment for reflection that is behind the camera by using a chrome ball or spherical probe image. Click on the map slot and load the Garden_mirrorball.tif image (shown below).
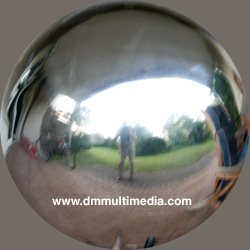
Again set the Reverse gamma Correction to 2.2. And this time we do boost the environment a little by setting the Multiplier to 1.3.
Go back to material slot 1 (we named Environment) and drag the Camera Map into the Background slot, and the Chrome Ball map into the Environment/Reflection Slot as shown below as Instances.
Open the Environments and Effects window (key 8) and add the Environment shader we created above to the Environment Map slot as shown below.
Select the fourth material slot and again click the Get material icon. Select the Matte/Shadow/Reflection (mi) shader as shown below.
Rename this to Matte Material and use the default settings (we will explore these settings later). Drag the Camera Map from material slot 2 to the Camera Mapped Background as shown below. Make this an instance. This is what is seen through our transparent Matte material.
With the basic environment shaders defined we can move on to setting up the geometry in part 2 : Using the Chrome Ball Shaders II.