3D Graphics, Tutorials and Tips
Using 3DS Studio Max and Mental Ray


3D Graphics, Tutorials and Tips
Using 3DS Studio Max and Mental Ray


Dr. Who's arch-nemesis, the Dalek as classic Genesis and New Series versions
H.M.S. Nelson, big gunned capital warship from WWII
Edwardian house. Old school architectural renderings
Assorted models and renders
These tutorials focus on using the Mental Ray renderer (iRay tutorials in preparation). The production shaders enable the easy integration of 3d Models into photographs.
These renders have been created to visualise scientific concepts and experimental layouts. A 10 minute HD film was also created.
Geological Waste Disposal Bluray/HD 2009
Geological Waste Disposal DVD 2003
PSG Experiment - Grimsel (Nagra)
Rendering and compositing of 3D models for international Clients
Front cover for Burton Power Catalogue 2012
Front cover for Burton Power Catalogue 2014
Front cover for Burton Power Catalogue 2015
Front cover for Burton Power Catalogue 2016
Wavemaster Design : Ferry design renders
Car Colour Services : Colour and spraying services
Volkswagen Crafter for Volkswagen Australia
DMMultimedia | 3d tutorials | mr Paint Techniques | Background : Lighting


Lighting is a critical component when rendering. It can make or break a scene. There are many ways to light a scene - in this section we will review a few methods from simple default lighting to more complex Skylight (GI style) lighting using Final Gather. A firm understanding of these techniques is required to understand and benefit from the following parts of this tutorial.
As part of this tutorial you can download the Max9 ![]() support scene that is used here 114 Kb
support scene that is used here 114 Kb
Included Scene Notes: The scene used below is included with all the lights already created. Most will be switched off. Following the tutorial below we shall switch on options when needed.
The default renderer is set to Mental Ray.
All the objects have a simple grey texture applied - this simple texture (Grey Specular) has Specular Level set to 40 and Glossiness to 50. The ground plane has a simple grey texture applied - this has no specular applied. Using a simple Grey Texture means we can concentrate on the lighting without getting distracted by flashy shaders.
Default Lighting
The supplied scene already has lights but if you deleted the lights this is what the render will look like. It is the standard Max default lighting. No shadows. This is shown here as a reference.
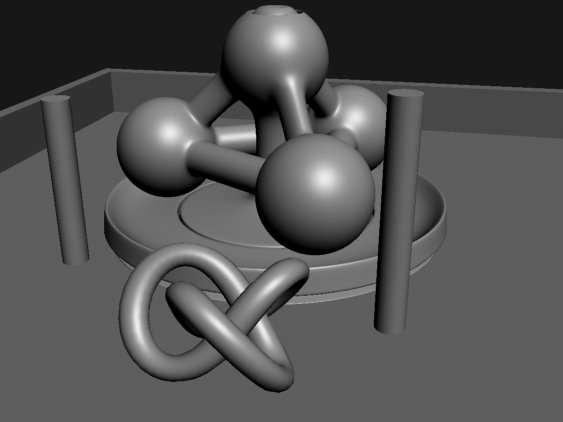
Single MR Area Spot
The supplied scene will render this image. It has a single MR Area Spot (The use of an area spot will be explained later) with intensity 1.0. It is positioned to the front left of the scene. By default the Spot casts shadows, so instantly we have a more realistic scene. But a very harsh light setup.
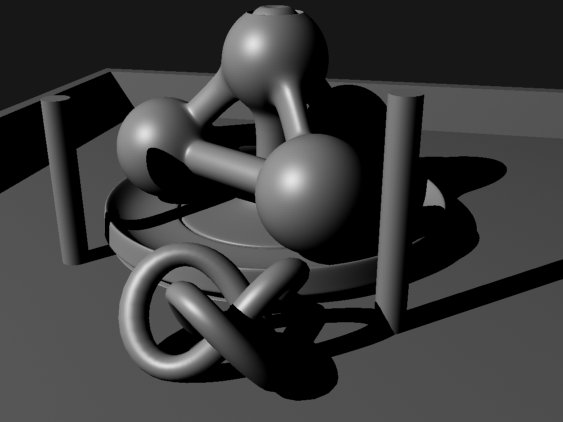
MR Area Spot & MR Area Omni
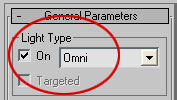 Now we improve on the above setup by adding a backlight to give a bit more depth to the scene. Select the MR Area Omni, select the modify panel and switch it on (see left).
This MR Area Omni has a strength of 0.7. It adds a kick light slightly behind and to the right of the scene. Things are starting to get more interesting.
Why have we been using MR Area lights ?
So, why have we been using Mr Area lights ? These lights have the ability to use an area over which the light is emitted, so instead of a single point source we can spread the source of the light. The main effect of this is the creation of soft shadows (even when we are using the required, and default, raytrace shadow setup).
This is a more accurate solution than shadow mapping and more closely mimics real life physics. Apart from creating soft shadow, the resolution of the shadow edge will be dependent on how close the shadow casting object is to the shadow receiving object. So objects close together have sharper shadows than those far apart (where the light rays have more distance to disperse/scatter).
 By default Area shadows are activated and set with a value of 1.0 - this has no real effect normally.
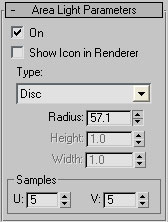
Because I have previously setup the Areas I have switched them off. We will now activate the Area shadows already set in this scene. Select the MR Area Spot and in the Modify panel scroll down to Area Light Parameters. Switch the Area Light on.
The other settings define the setup of the area that emits the light. I have changed this to Disc from the default Rectangle. The samples explain how many light points we will use (In this case of a Disc, it tells us how many light points exist on how many concentric circles). More samples will increase the resolution of the shadows, but the default is good for us.
 The Radius value is the main value we will adjust. This physically increases the Disc that the Area light uses to emit the light rays.
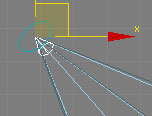
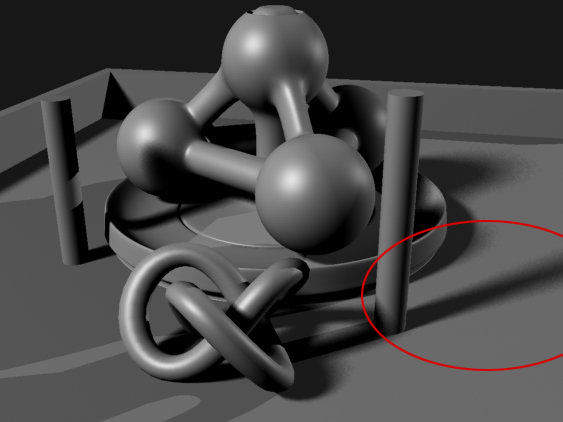
To see this Disc try increasing the value by clicking on the increase or decrease button. You will see in the active viewport a disc around the MR Area Spot (see right). Reset the area value to 57.1.
As expected, the greater the Disc the greater the area that emits light rays and the softer the shadows that are cast. Bear in mind that the greater the area of the Disc you will be spreading the samples more thinly and the resolution of the shadow will decrease. Increase the samples to increase the quality of the shadow for larger areas.
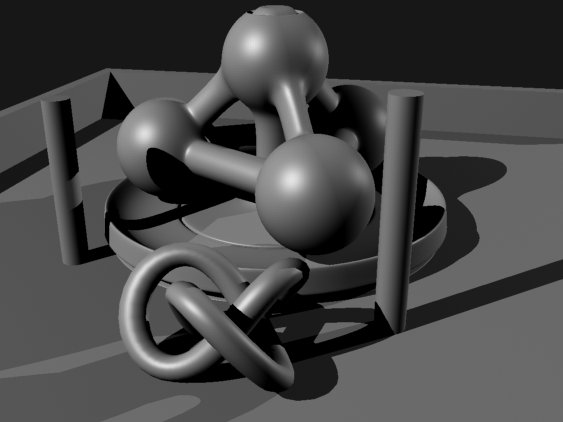
Click render and we get the image below.
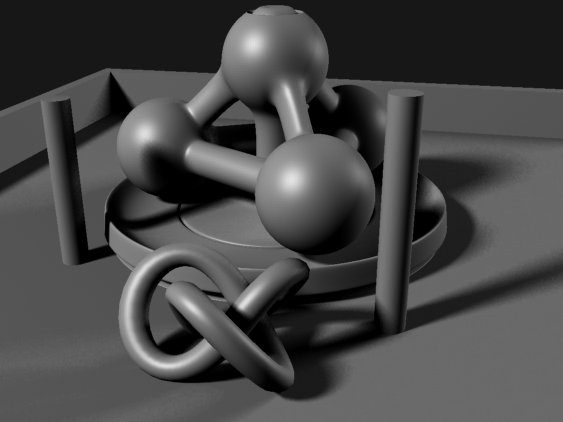
MR Area Spot and MR Area Omni using Area Shadows
Now activate the Area Light Parameters for the MR Area Omni. Leave all the values as they are set. Render the scene. Now we are getting there - smooths things out. For some scenes this type of lighting may be sufficient.
Using Skylight and Final Gather
This step really starts to use the advanced features of Mental Ray. We will use a Skylight with Final Gather. Instead of a single point source (or even area like above) a skylight surrounds a scene and emits light, much like real life. And with some settings it will also take into account bounced light. This can result in some very realistic lighting and with Max9's FG settings it can still be relatively quick.
To setup our scene for a skylight we need to adjust a few things. Firstly, switch OFF the MR Area Spot and MR Area Omni. You will notice that our scene goes black ! That is to be expected as we have no light source. Press CTRL + L to activate default lighting, we should now be able to see our scene again.
Now select the Skylight, go to the Modify panel and switch it on. One thing to note is that the Skylight can be positioned anywhere in the scene, as it emanates a global light energy its position in a viewport is not important.
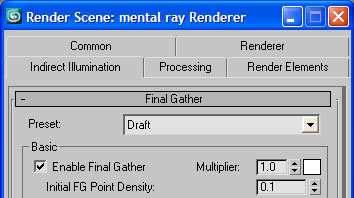
Open the render options window and select Indirect Illumination and Final Gather. Switch on Final Gather and use the Draft setting (should already be selected) from the drop down menu for presets.
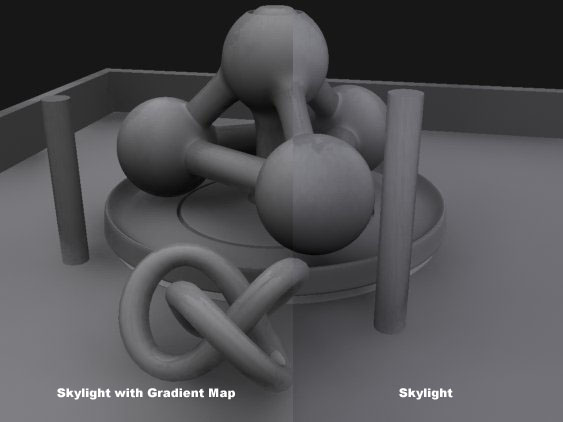
Press render. First thing you will notice is that Max9 now shows a preview of the FG calculations. We get the image below:
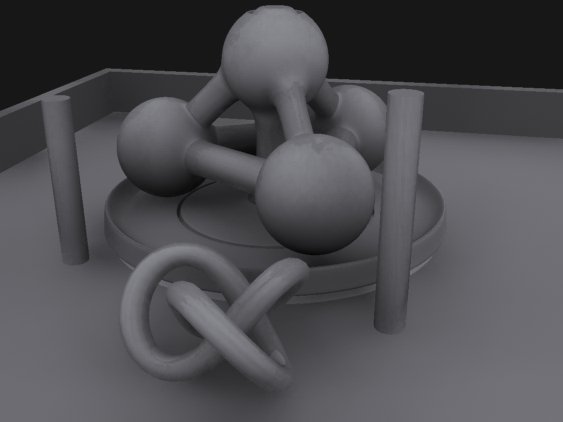
This looks very realistic with a global light source but a couple of things to note:
OK, so let's address these issues.
1. Uniform lighting from the Skylight.
For most cases this might be fine. But we will subtley improve on this by creating a map to control the way light is emitted from the Skylight. In this case we wish to have more light coming from above and almost none coming from below.
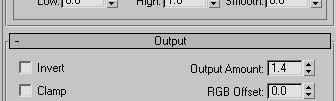
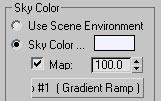
Open the Material Editor and you can see a Gradient Ramp texture. This is a simple gradient setup as a spherical environment with white above the horizon. Because we are basically halving the area that the Skylight emits light with we need to boost the output a little for maintaining the same light levels in the scene - look at the Output section :
This map has already been applied to the Skylight. Select the Skylight and activate the map :
Now render the scene again. It might not appear that different but there are subtle changes. There is now not so much light coming from lower down in the scene, mainly from above. The difference in light colour is because the standard Skylight has a very slight blue tint by default.
2. Resolution of fine shadows.
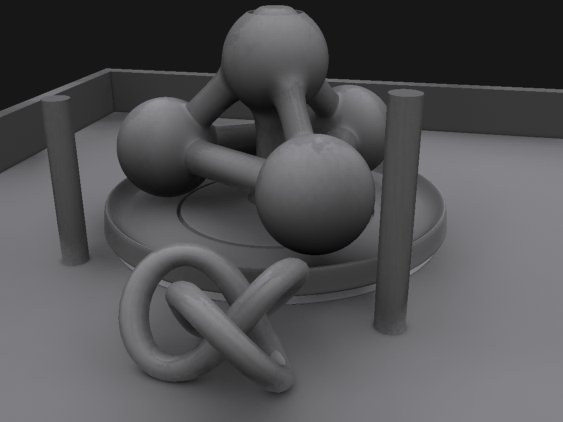
The Draft mode we selected for Final Gather will render the image quickly but does not result in well defined shadows at the base of objects (floating effect). We would like to retain the speedy render but add more definition to the shadows. We can do this without increasing the Final Gather settings (with associated increase in render time) by using a new MAX9 material - the Arch & Design material.
There is a Arch & mat material called Arch Mat Ground already setup in the Material Editor, directly below our main Grey Specular material. This has already been applied to our ground object.
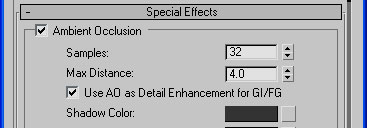
This material has been setup for no specular. But the main feature we wish to take advantage of is local Ambient Occlusion. Scroll down the Arch Mat Ground material and locate Special Effects. Switch on Ambient Occlusion. This has had the samples boosted from standard to 32.
Now press render. Notice that it still renders quickly, but now we have much better shadow resolution under the objects.
3. Adding Specular highlights.
A Skylight emits light in a global envelope. We can control where and how it emits the light by using a map. In our test case we used a Gradient Ramp but we could also have used a slightly blurred HDRI - this would also have tinted the light as well as controlling the direction where the light comes from. But it will never be refined enough to effect the specular on an object.
We can now add specular highlights by activating our MR Area Spot and MR Area Omni lights. In this case we will only have the MR Area lights contribute to the specular and not the diffuse lighting of the scene.
Select the MR Area Spot, switch it ON, then go the Modify Panel, scroll down to Advanced Effects and deselect Diffuse - our MR Area Spot will only add Specular effects to the scene.
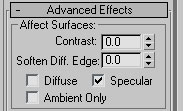
Do the same for the MR Area Omni - switch on the light and switch Diffuse off in the Advanced Effects section.
Render the scene :
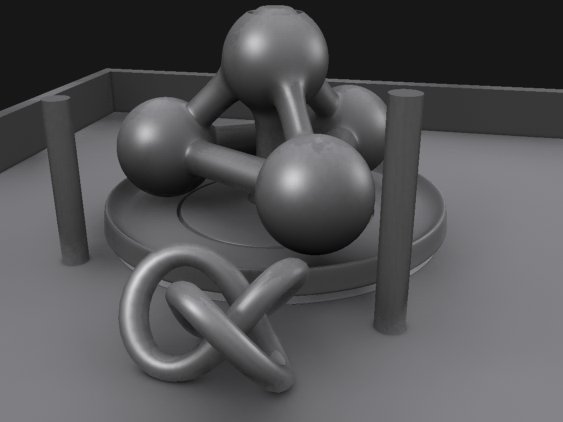
It is also possible to balance the strength of the Skylight (make it less intense) and switch on the Diffuse component of the MR Area lights (also reducing the intensity). In the examlpe above the strength and Disc area could be altered to get an even more realistic image, but the settings were kept for simplicity.
This is just a quick background to some of the lighting techniques we will use in the following Tutorial sections. There are many other ways of lighting but the setup shown will be used for the Tutorial.