3D Graphics, Tutorials and Tips
Using 3DS Studio Max and Mental Ray

3D Graphics, Tutorials and Tips
Using 3DS Studio Max and Mental Ray


Dr. Who's arch-nemesis, the Dalek as classic Genesis and New Series versions
H.M.S. Nelson, big gunned capital warship from WWII
Edwardian house. Old school architectural renderings
Assorted models and renders
These tutorials focus on using the Mental Ray renderer (iRay tutorials in preparation). The production shaders enable the easy integration of 3d Models into photographs.
These renders have been created to visualise scientific concepts and experimental layouts. A 10 minute HD film was also created.
Geological Waste Disposal Bluray/HD 2009
Geological Waste Disposal DVD 2003
PSG Experiment - Grimsel (Nagra)
Rendering and compositing of 3D models for international Clients
Front cover for Burton Power Catalogue 2012
Front cover for Burton Power Catalogue 2014
Front cover for Burton Power Catalogue 2015
Front cover for Burton Power Catalogue 2016
Wavemaster Design : Ferry design renders
Car Colour Services : Colour and spraying services
Volkswagen Crafter for Volkswagen Australia
DMMultimedia | 3d tutorials | Production Shaders in Mental Ray | Using a 360 HDRI environment

The Mental Ray Production Shaders in 3DS Max enables a whole set of features and shaders to help with compositing 3D models into images/environments. An example of these shaders in action (created by Zap Andersson) can be found on YouTube here.
In this free tutorial we will use the Environment/Background Switcher, Environment/Background Camera Map, Environment HDRI and Matte/Shadow/Reflection shaders. This tutorial is constructed in Max 2009 Design - but it is possible to use some of these shaders (The shaders use slightly different names and gui layouts) in Max 2008.
In Max 2008 some of the shaders are "hidden" by default. To unhide them you will need to open the .mi files in a text editor and remove the ", hidden" from each declaration. Please see the previous tutorial for detailed setup of shaders required.
In this simple scene we will use the following shaders:
Initial Setting up
We will use the scene we setup in Part 1 and 2. Please follow the setup instructions outlined in Part 1 and 2 for setting up units, exposure and materials (especially the matte/shadow/reflection, Camera Map and Environment/Background switcher).
Setting up our Material Editor Slots
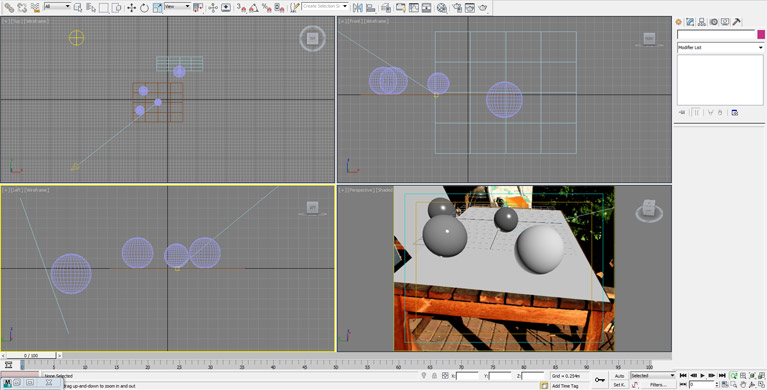
We will use our previous scene and add a simple bitmap (360 degree HDRI) material to slot 5. First replace the Camera Map image with the new Garden_sunny_2.jpg image, and adjust your viewport to match the table top - see the image titled Perspective Viewport adjusted for new background image below for this setup.
For the new 360 HDRI, select the fifth material slot and click on the Get Material icon.
Select a bitmap shader :
With the Bitmap shader selected you will be asked to load an image. Choose the house_panorama_hdr.hdr file which is included in the files to download (see here). Change the name to 360 HDRI. In the coordinates panel change to Environ and Spherical Environment as shown below. Another important value to change is Tiling. This is important because by default 3ds Max wraps the bitmap around the OUTSIDE of an object. In this case we will be looking from the INSIDE of the environmental sphere. So to mirror image the Environmental Bitmap change the U: Tiling value to -1 as shown below.
We will now replace the Chrome Ball shader with our HDRI. Select the first material slot called Environment. Open the maps tab. Then select the new Bitmap map we just created (360 HDRI) and drag it to the Environment/Reflection slot as shown below. Make this an instance - this will be useful later when changing bitmaps (explained in next section).
The HDRI you loaded is a 360 degree image taken of the real environment. The panorama viewer below shows this HDRI as a tone-mapped JPEG.
Setting up the viewports and HDRI position
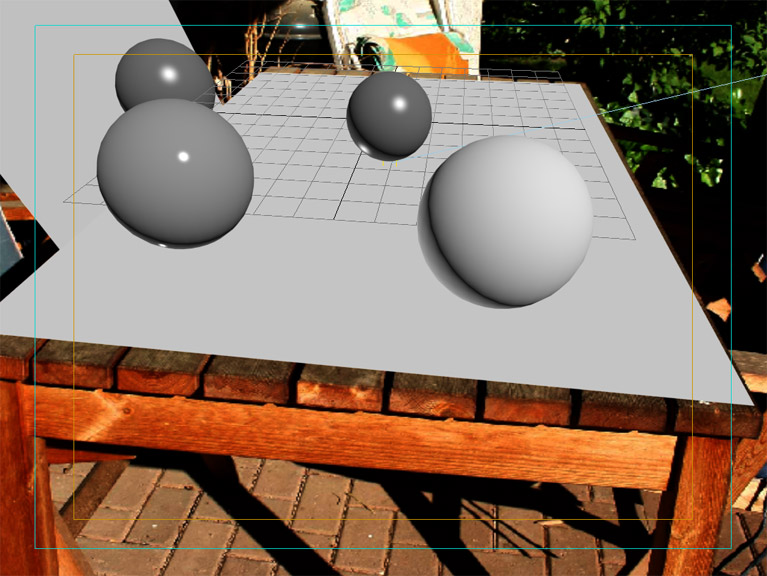
See Part 1 of this tutorial to see how to add a bitmap to a viewport background. We will add a new image to our perspective background. Load in Garden_sunny.jpg and adjust the viewport position to match the table top. It will now look as shown below. We will used the same light setup as previously - a skylight with the environment shader and a single mr spot light.
We need to adjust the orientation of our 360 HDRI Bitmap to match our viewport. The 360 HDRI Bitmap was centred on the lawn in front of the table so it will not be a perfect match, but it will be fine for matching the position of the sky, sun and house.
From the main menu select Views - Viewport Background - Viewport Background and select "Use Environment Background". The images below show the setup for the earlier versions of Max, and for Max 2013.
As stated in Part 1, this will now make the viewport window show a black background (the environment background switcher). We can now quickly add the 360 HDRI image to the Environment Map slot as shown below - to replace the existing Environment/Background Switcher material. Drag the 360 HDRI material across and tick instance.
With the HDRI now being displayed in the main viewport we can rotate the HDRI to match the backplate. When loaded in with a U offset of 0.0 you should see the image below:
Because we captured the HDRI a little bit to the side of the table, it will not be possible to completely match the backplate. But the important point to try and match is the direction of the sun. I used the U offset of 0.38 to match the alignment of the backplate.
We now need to switch back the Environment Map to the previous Environment/Background Switcher material, again select "instance". The Viewport background will be black.
Set the Environment Map back to the Environment/Background Switcher material through the main menu select Views - Viewport Background - Viewport Background and select "Custom Image File". You should now see the following :
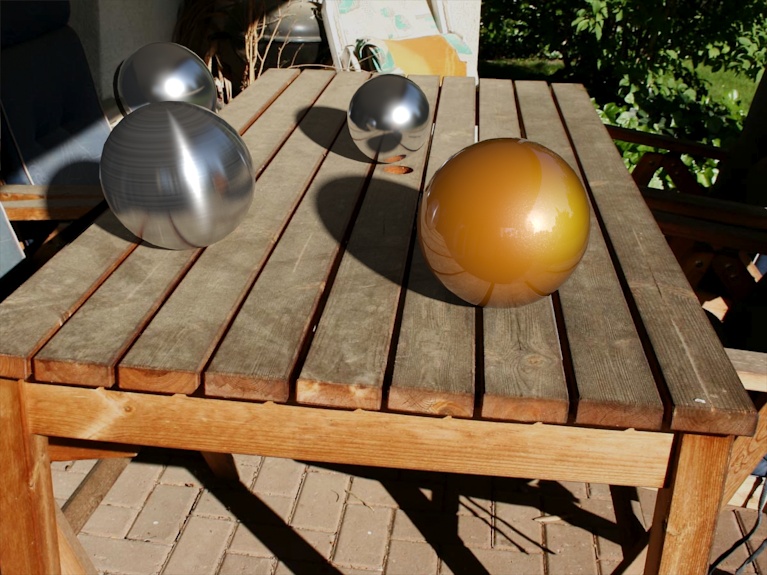
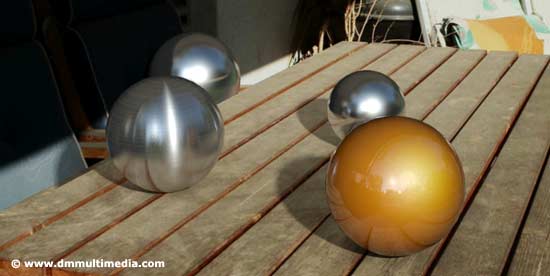
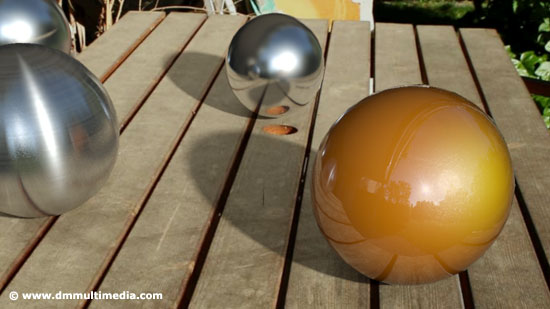
This will give you this final render :