3D Graphics, Tutorials and Tips
Using 3DS Studio Max and Mental Ray

3D Graphics, Tutorials and Tips
Using 3DS Studio Max and Mental Ray


Dr. Who's arch-nemesis, the Dalek as classic Genesis and New Series versions
H.M.S. Nelson, big gunned capital warship from WWII
Edwardian house. Old school architectural renderings
Assorted models and renders
These tutorials focus on using the Mental Ray renderer (iRay tutorials in preparation). The production shaders enable the easy integration of 3d Models into photographs.
These renders have been created to visualise scientific concepts and experimental layouts. A 10 minute HD film was also created.
Geological Waste Disposal Bluray/HD 2009
Geological Waste Disposal DVD 2003
PSG Experiment - Grimsel (Nagra)
Rendering and compositing of 3D models for international Clients
Front cover for Burton Power Catalogue 2012
Front cover for Burton Power Catalogue 2014
Front cover for Burton Power Catalogue 2015
Front cover for Burton Power Catalogue 2016
Wavemaster Design : Ferry design renders
Car Colour Services : Colour and spraying services
Volkswagen Crafter for Volkswagen Australia
DMMultimedia | 3d tutorials | Production Shaders in Mental Ray | Using the Chrome Ball Shaders II

Mental Ray's Production Shaders in Studio 3DS MAX part 2
Scene setup - adding a Background image
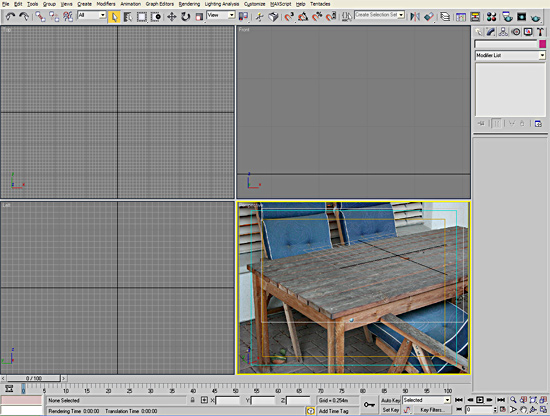
With the Environment Switcher in our Environment slot we need to setup our Perspective viewport to show our background plate (Garden.jpg). For normal environment image maps we could select the Perspective viewport then go to the main menu and select Views, Viewport Background (Alt + B - shown below) and tick the Use Environment Background check box, then right mouse click in the perspective view and select Show Background.
If you try the above method with the Environment Switcher we presently have in the Environment slot it will display a black background, so we need to use the Viewport Background window (shown above) and clicking on the Files... button and browse directly to select the Garden.jpg file. Leave all the values at default and click OK, then right click in the perspective window and select Show Background. You should now have the Garden.jpg image in the Perspective Viewport as shown below.
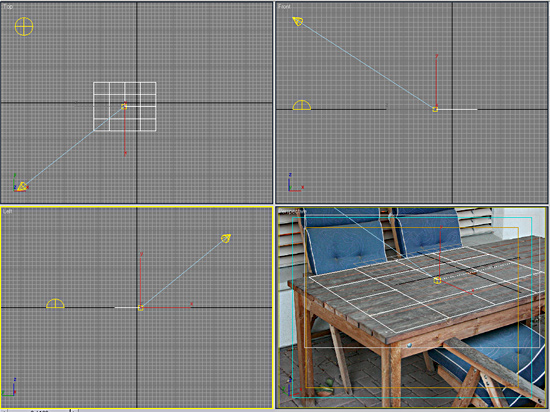
Now we need to add a plane to use with our Matte material. In the Garden.jpg we can see that the table top will be a perfect guide for adding our plane. Click on the Top viewport and add a simple plane. Select the Perspective view and manipulate the viewport (Zoom, Pan view) and Plane dimensions (length and width) to get the Plane lying on the table top. You will also probably need to alter the Field of View to match the camera I used when taking the photo. Try to get this as accurate as possible. I managed to get this:

Add our Matte Material (which we defined on the previous section) to this plane.
Lights
We will add 2 lights to the scene. A Skylight and an mr Area Spot.
Select the Top viewport and create a Skylight. Set the properties to:
Multiplier : 0.8
Sky Color, tick Map and add our Environment Map (which we defined on the previous section) to the slot as shown below.
Select the Top viewport and create an mr Area Spot. I tried to match the basic direction of the sun with this light. As I took the photo myself I know approximately which direction the sun is. Adjust the light as shown below:
It is also an overcast day so we need to give this light soft area shadows. Set the mr Area Spot with Multiplier: 0.3 and Area Light Parameters as shown below (Disc with radius 1.958m). This will give us soft shadows. Note that your table plane/mask we created above should have realistic dimensions in metres.
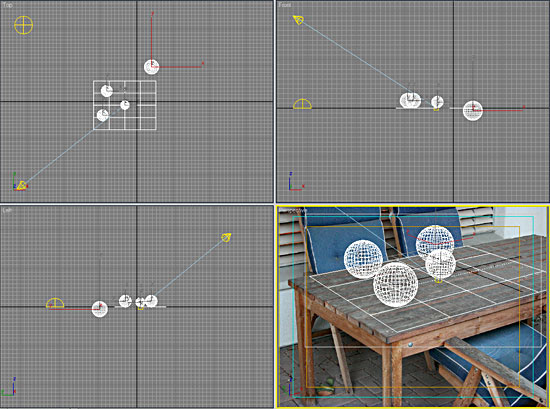
Now we need to add some geometry. I added a few simple spheres and placed one as if it was on the seat at the back (behind and below our matte plane) as shown below. Add a chrome material (Chrome setting in the Template pull down menu in an Arch and Design material), a Brushed metal material (again from the Templates in the Arch & Design material) and a Car Paint (mi) material to the spheres. Nice and reflective objects.
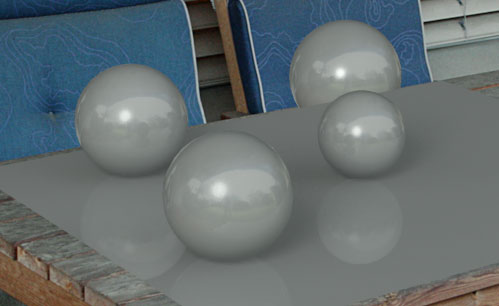
We are now ready to render. I have setup the lights for the scene but it is a little difficult to balance the lighting with reflective objects as they can appear illuminated from the bright environment map. One way to quickly check is to add a default grey material (I used a default Arch & Design material) to the Material Override slot in the Render Setup window. Click Enable and drag the Arch & Design material into the Material slot.
Try a test render. You can now balance the lights before checking with reflective objects. I get the following:
Open the Render Setup window and untick the Material Override, and render again. You should get the following:
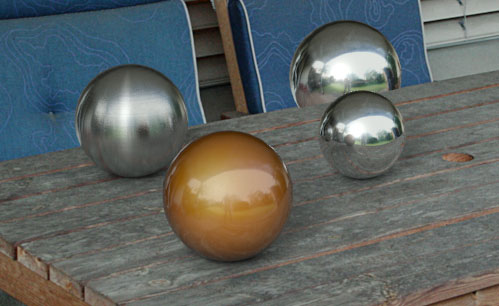
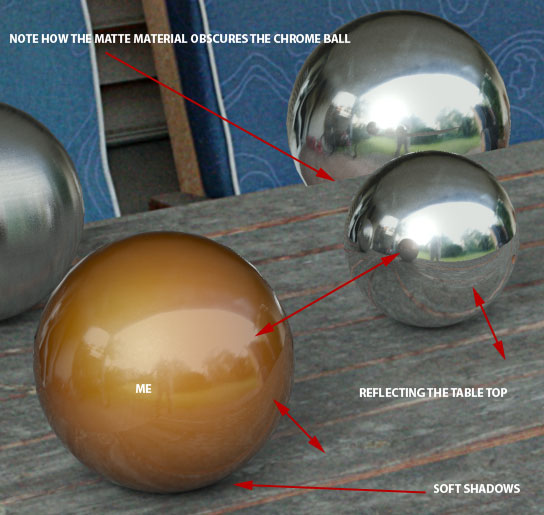
Notice the soft shadows on the table top, and the way the actual table top is reflected in the spheres:
The next section will discuss more methods on using the Production Shaders, mirror ball creation (LDR and HDR) and explore more of the shader parameters : Using a 360 HDRI environment