3D Graphics, Tutorials and Tips
Using 3DS Studio Max and Mental Ray


3D Graphics, Tutorials and Tips
Using 3DS Studio Max and Mental Ray


Dr. Who's arch-nemesis, the Dalek as classic Genesis and New Series versions
H.M.S. Nelson, big gunned capital warship from WWII
Edwardian house. Old school architectural renderings
Assorted models and renders
These tutorials focus on using the Mental Ray renderer (iRay tutorials in preparation). The production shaders enable the easy integration of 3d Models into photographs.
These renders have been created to visualise scientific concepts and experimental layouts. A 10 minute HD film was also created.
Geological Waste Disposal Bluray/HD 2009
Geological Waste Disposal DVD 2003
PSG Experiment - Grimsel (Nagra)
Rendering and compositing of 3D models for international Clients
Front cover for Burton Power Catalogue 2012
Front cover for Burton Power Catalogue 2014
Front cover for Burton Power Catalogue 2015
Front cover for Burton Power Catalogue 2016
Wavemaster Design : Ferry design renders
Car Colour Services : Colour and spraying services
Volkswagen Crafter for Volkswagen Australia
DMMultimedia | 3d tutorials | Headlight - Spherical | Headlights in Mental Ray


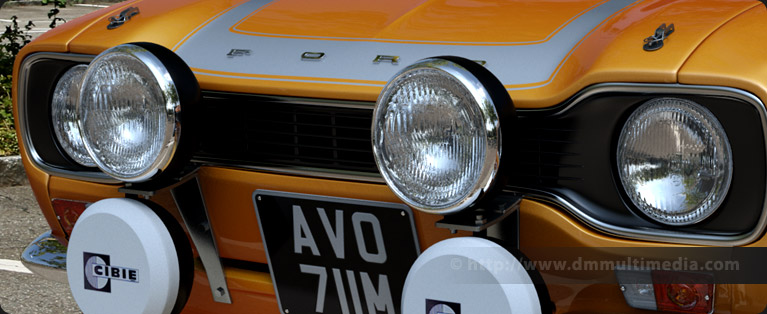
Using Mental Ray for Car Headlight Textures
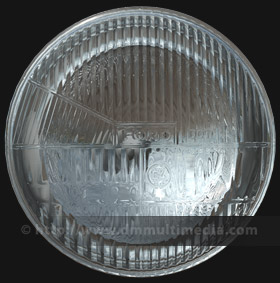 This is an update to the earlier section (where we used the old Architectural shader). I could never get a realistic look using Arch & Design materials with a single bump map. After a lot of experimenting I finally used a combination of physically accurate glass (the lense has a real thickness) and a Normal (and Bump) map. But using the Normal/Bump map on the inner surface ONLY.
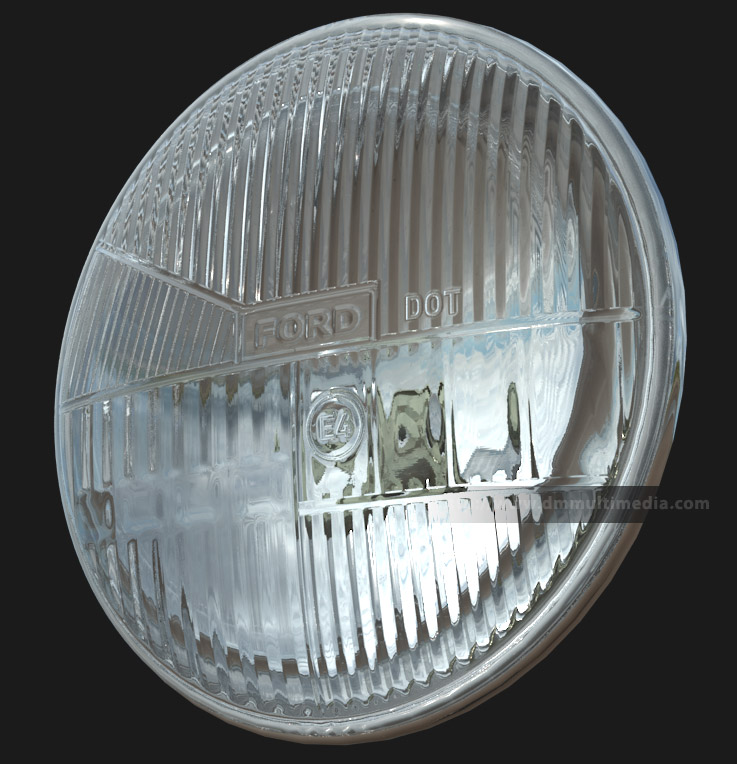
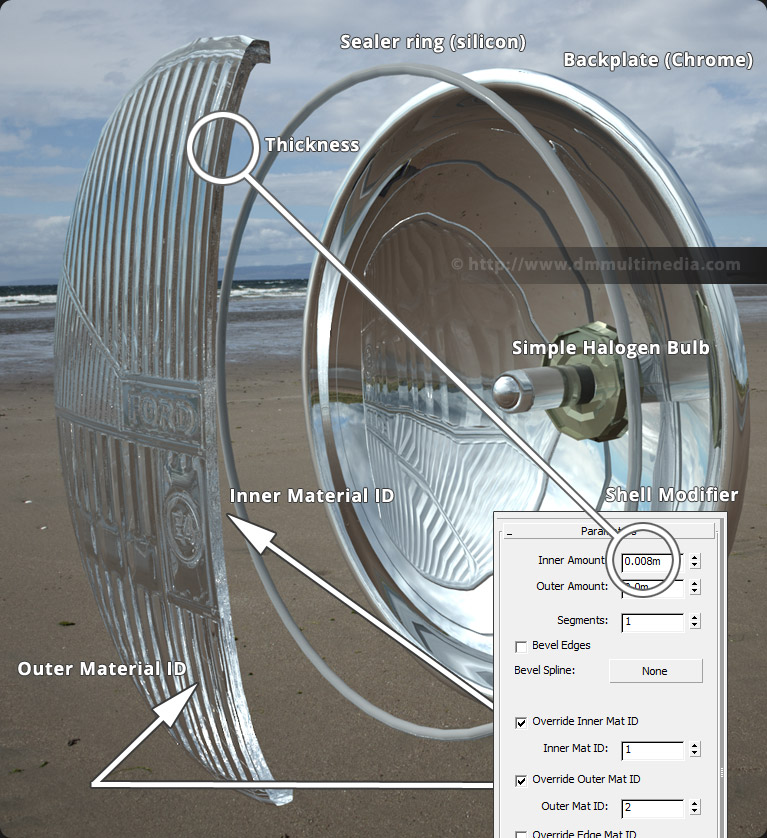
With this method you will need to have a lense that is a solid object. The simplest way to do this is to follow the construction stage here, then add a shell modifier to your lense. IMPORTANT : Use the shell modifier to give the internal face and the outer face different material IDs.
I went one step further by collapsing the lense to an editable poly. I did this as the shell modifier did not apply a uniform thickness (the lense was slightly thinner in the middle). YOu might not need to do this step.
I created the lense bump patterns using Photoshop, and also the Normal Map using the Nvidia plugin for Photoshop ( see Nvidia's website ). An example set of textures is available to download below.
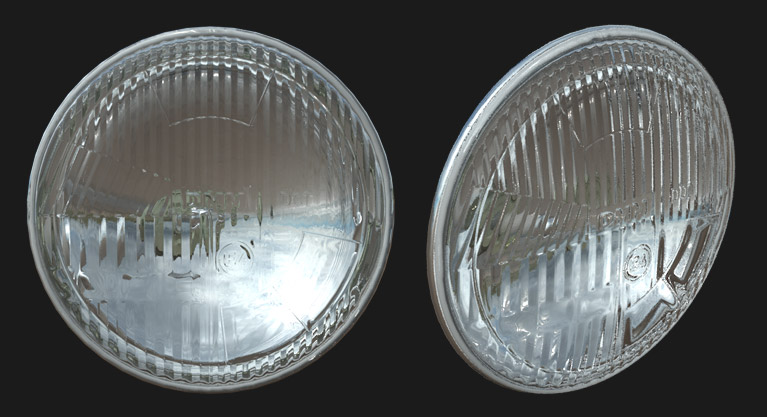
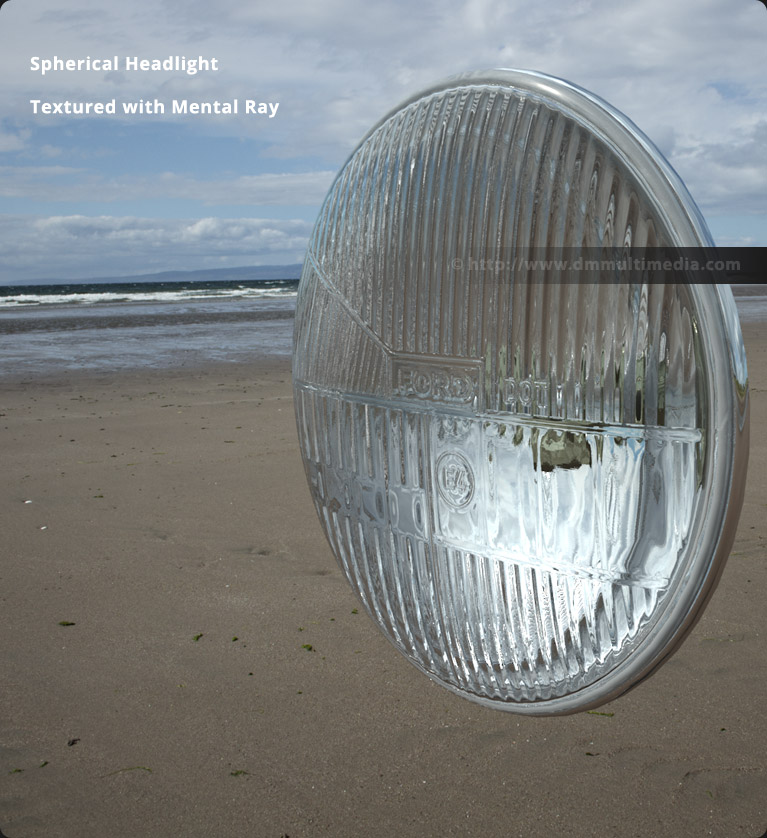
Car Headlight Modelling Setup
The images below show an exploded view of the Car Headlight. It is important that the car lense has realistic thickness, as we will be using an IOR (index of refraction). This will bend (refract) the light by a set amount, depending on the IOR value, as it enters the lense - and bend it back by the same amount as it leaves the lense (rear facing polys). Without the rear facing polys you would get an unrealistic reflection in the back plate.
We need different material IDs on the parts of the lense. The front facing and side polys should have one material, and the inner material another ID. This is because we will be applying a simple smooth glass material to the front of the lense, and the ridged, bump-mapped texture to the inner surface.
Also worth noting : the backplate should not have too deep a curve. If your curve is too deep you will get a lot of internal reflections, you primarily want reflections from outside the headlight - in reverse, and in the real world, you want as many rays of light to leave the light.
Car Headlight Texture Setup
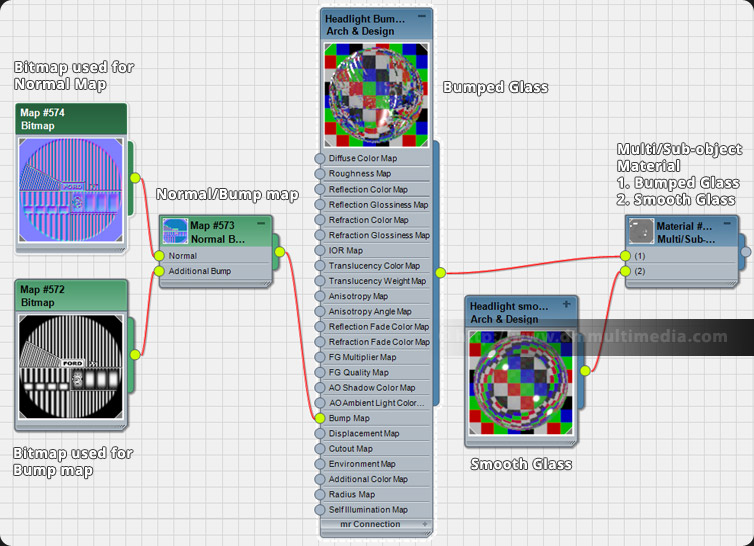
The main texture uses a Multi/Sub-object texture. We will use 2 slots/material IDs. One for the smooth glass on the front of the lense, and one for the bumped glass behind the lense. Both Glass textures are Arch & Design materials. The Bumped Glass uses a Normal Bump Map, with a Normal and Bump bitmap.
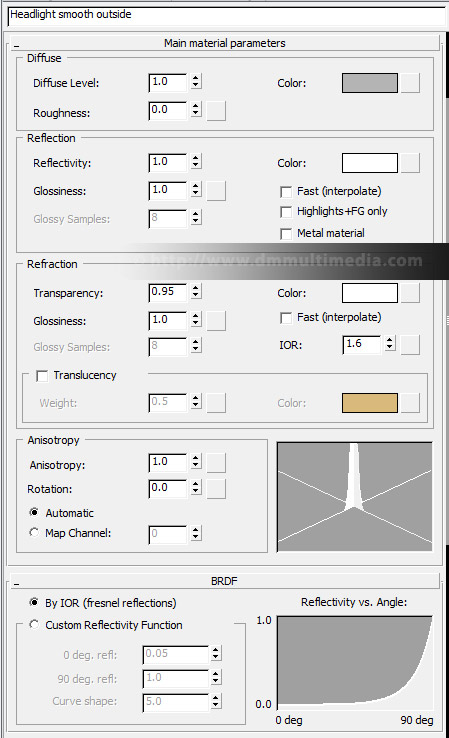
The Bumped glass uses the following settings. The smooth glass shown below uses basically the same settings. Both materials should use the same IOR.
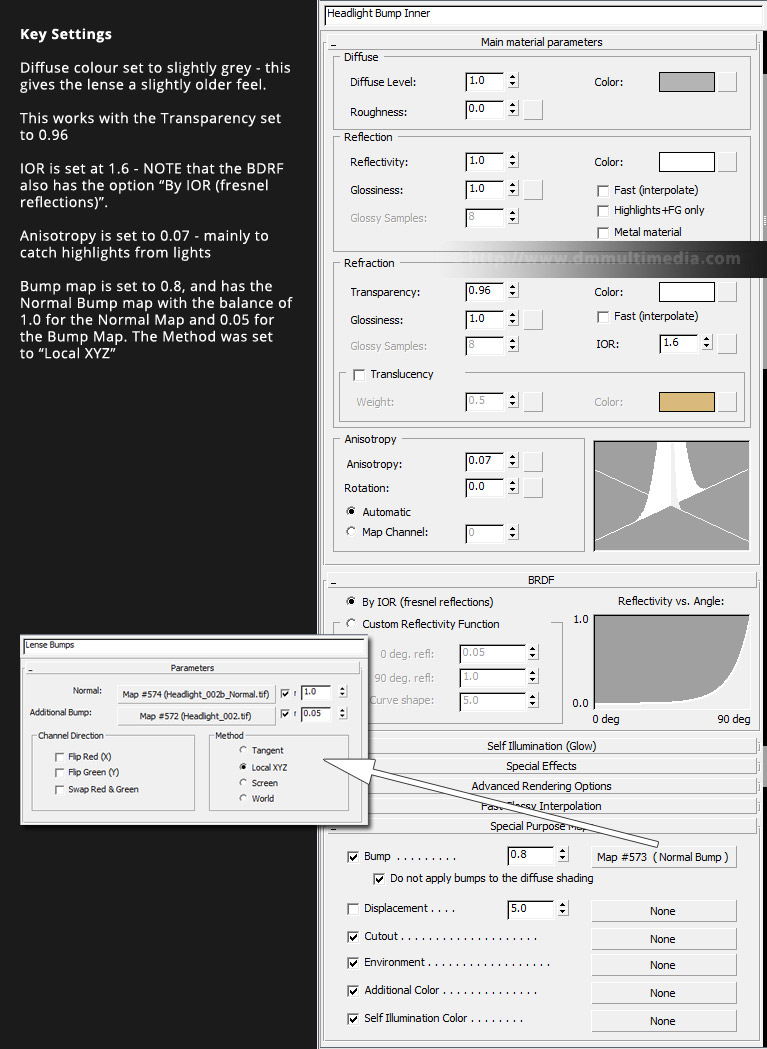
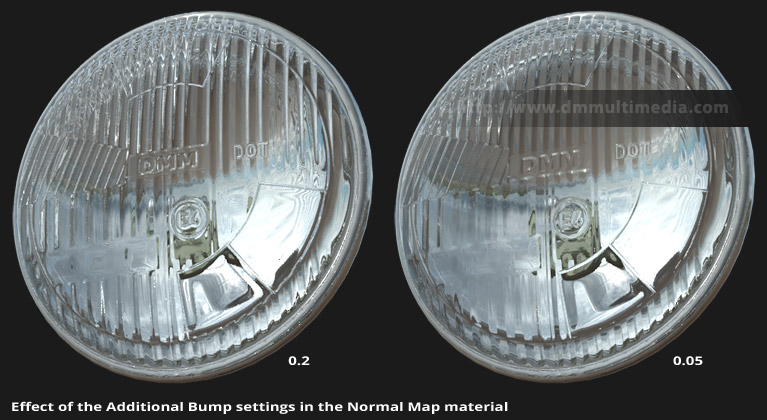
NOTE: To adjust the strength of the bump mapping you can increase the Additional Bump Map weighting in the Normal map settings. For a much stronger effect this can raised. In the example below the values of 0.05 and 0.2 were used. Try a value of 0.1 or 0.2. To see the different effectseither the Normal and Additional Bump maps have on the Normal Bump map shader you can switch either one off and do a test render.
The image below shows the effect of adjusting the Additional Bump Map setting - 0.2 and 0.05.
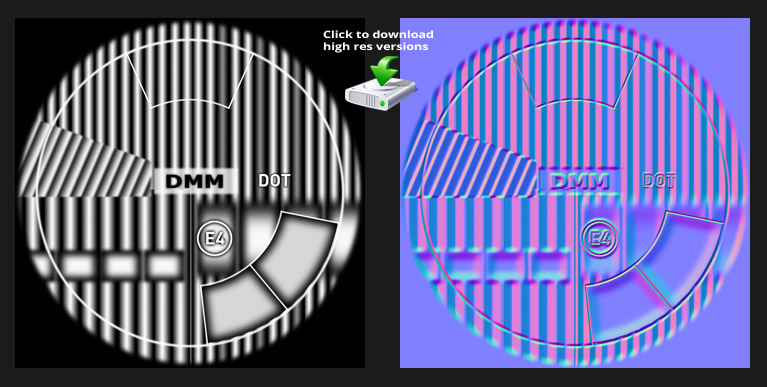
Lense Bitmaps used
The original Bump Map for the lense was created in Photoshop and the following settings for the Nvidia Normal Map filter in Photoshop were applied :
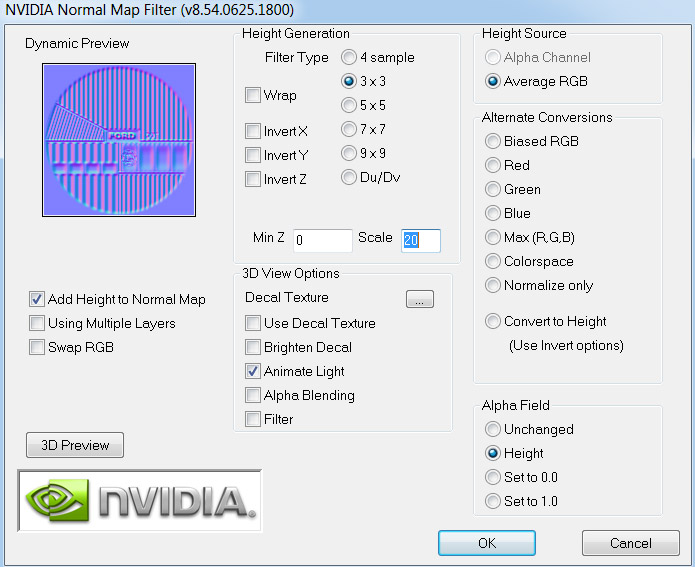
This resulted in the following Bump and Normal Maps :