3D Graphics, Tutorials and Tips
Using 3DS Studio Max and Mental Ray

3D Graphics, Tutorials and Tips
Using 3DS Studio Max and Mental Ray


Dr. Who's arch-nemesis, the Dalek as classic Genesis and New Series versions
H.M.S. Nelson, big gunned capital warship from WWII
Edwardian house. Old school architectural renderings
Assorted models and renders
These tutorials focus on using the Mental Ray renderer (iRay tutorials in preparation). The production shaders enable the easy integration of 3d Models into photographs.
These renders have been created to visualise scientific concepts and experimental layouts. A 10 minute HD film was also created.
Geological Waste Disposal Bluray/HD 2009
Geological Waste Disposal DVD 2003
PSG Experiment - Grimsel (Nagra)
Rendering and compositing of 3D models for international Clients
Front cover for Burton Power Catalogue 2012
Front cover for Burton Power Catalogue 2014
Front cover for Burton Power Catalogue 2015
Front cover for Burton Power Catalogue 2016
Wavemaster Design : Ferry design renders
Car Colour Services : Colour and spraying services
Volkswagen Crafter for Volkswagen Australia
DMMultimedia | 3d tutorials | BBS Alloy | Modelling the Outer Rim and Bolts


Part 3. Modelling the Outer Rim and Bolts
This is quite a short section - pretty straightforward.
First switch to the side view and draw the outline shape of your rim using the Spline - Line tool - close the loop. This is now entirely up to you what your rims will look like - I've tried to get an authentic BBS Shape.
Edit the vertices to get the shape you want. because we are still in the y=0 plane we can Insert more vertices if we need them.
Switch to the Pivot - Edit Pivot Only and move the pivot point so that z=0 :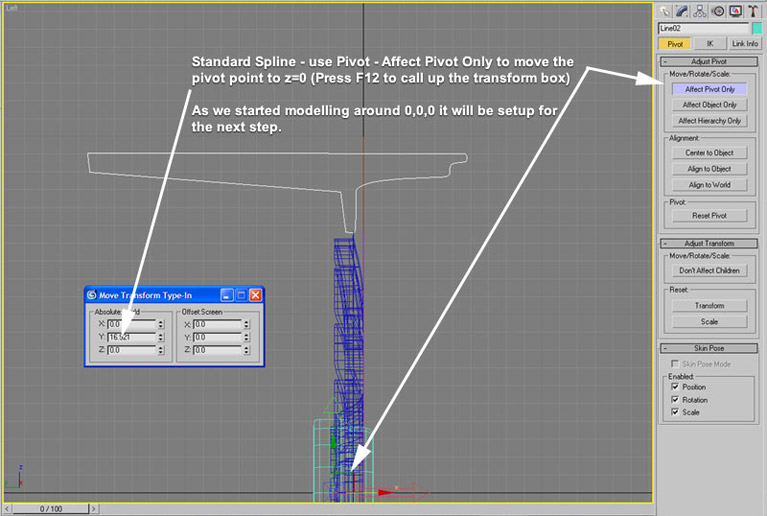
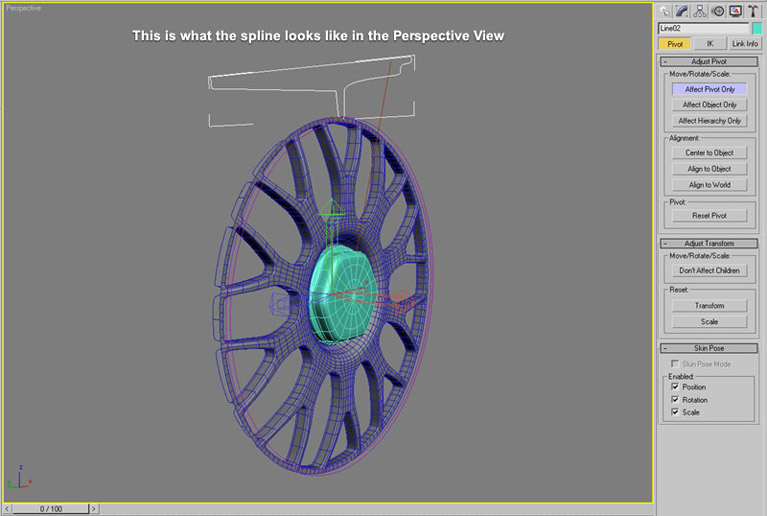
This will look like this in the perspective view :
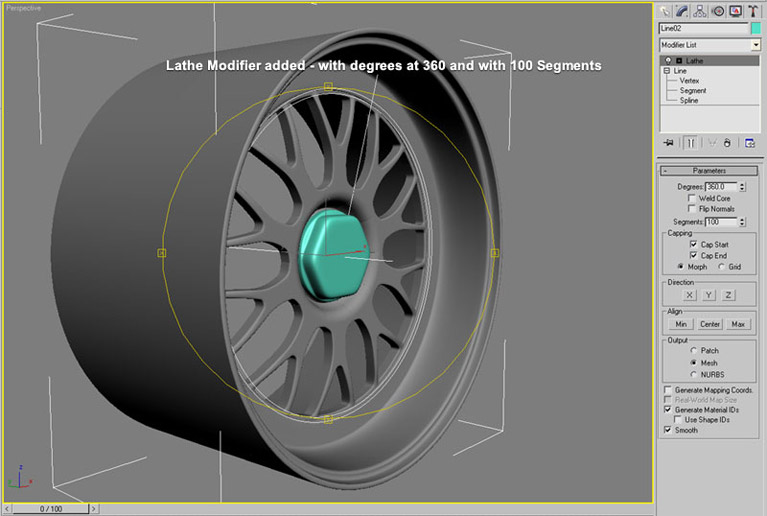
Add a Lathe modifier. It should already be in the correct plane for rotation but if not you can change it on the Lathe panel under Direction. The Segments value is set to 100 - you can alter this to get the refinement you need.
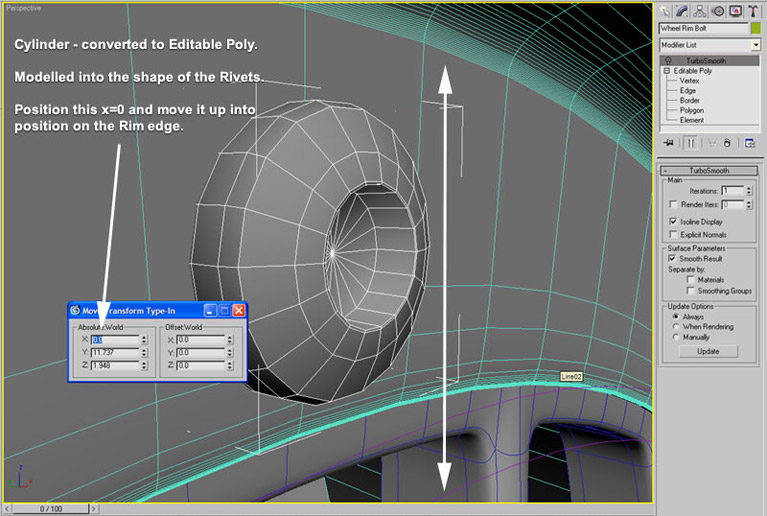
Now the little rivets that surround the rim. I created these from a Cylinder which I turned into an Editable Poly. Just move the edges about and chamfer until you get this shape.
Make sure that this rivet is at x=0 then slide it up and down on the z plane until it is on the rim (push back forward in the y plane also).
I added a Turbosmooth modifier to it. But you could just select all the polygons and make them the same smooth group. Unless you want to look very closely that would be enough.
Again move the pivot point to z=0. As below :
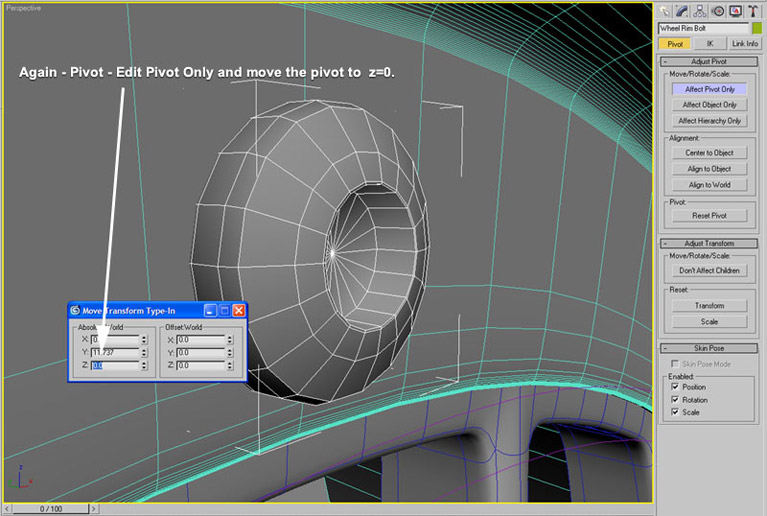
Now use the Array modifier with the following settings - it is an exact match ! Use Instance.
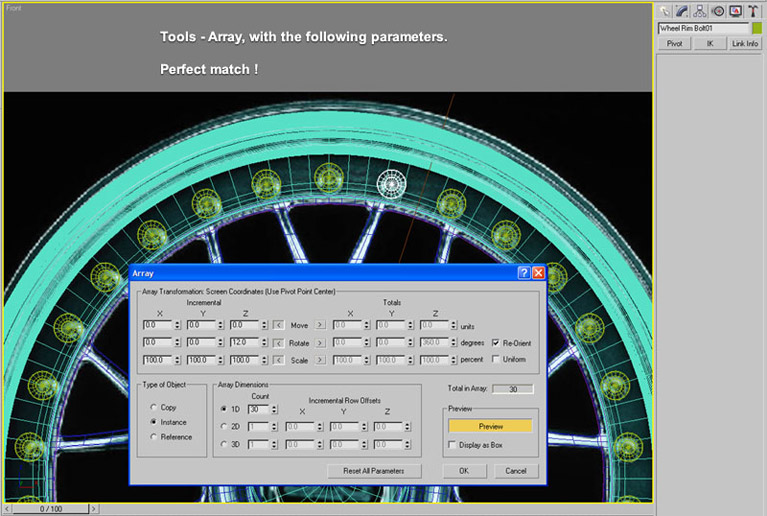
this should give us this :

Continue to : Part 3.Texturing and Lighting